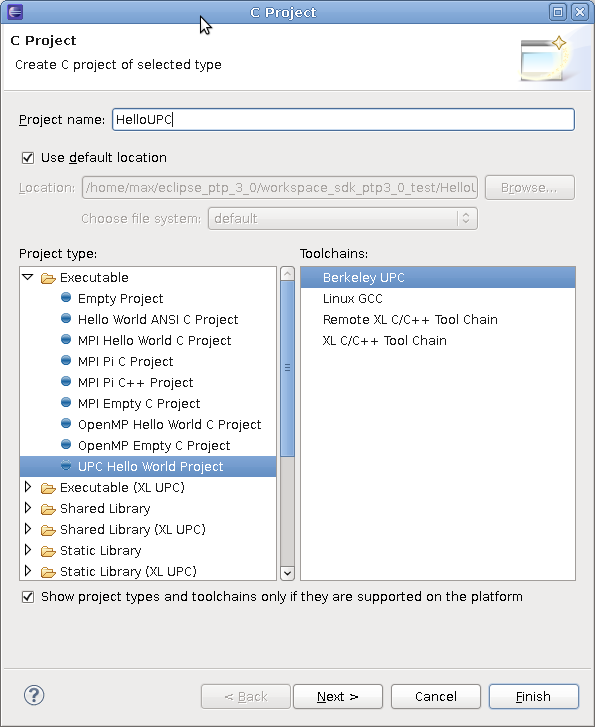
Figure 9.1: UPC Hello World Project
Next: Using PPW within Eclipse, Previous: Eclipse Tool Installation, Up: Eclipse PTP Integration
In this section we outline the creation of a UPC project within the Eclipse environment; note that this assumes that the Berkeley UPC Project Wizard feature has been installed (as described in the Eclipse Tool Installation section).
Within the Eclispe workbench, first switch to the C/C++ perspective using the Open Perspective button. Then select File from the menubar or right-click in the Project Explorer, and choose New > C Project.
You should see a dialog like that shown in Figure 9.1.
As an initial example, we will create a UPC Hello World Project by selecting that option (under Executable) from the Project type tree. Enter a name for the project and choose Berkeley UPC from the available toolchains. Click Next >.
Now fill in the fields on the dialog as shown in Figure 9.2.
After clicking Next > again, you should see a dialog with both Debug and Release configurations selected. Go ahead and click Finish to create the UPC Hello World project.
Once the project is created, you may want to adjust some settings for the Berkeley UPC compiler. You can do this by right-clicking on the project name in the Project Explorer, choosing Properties, and then selecting Settings under C/C++ Build on the left side of the dialog.
Many compiler settings in various categories can be adjusted based on the needs of your project. More detailed documentation on Berkeley UPC and its various compiler options are available from the Berkeley UPC Documentation page.
With your UPC project set up in your Eclipse workspace, you can navigate within the Project Explorer to the main UPC source file located under the source-code directory you specified. If you then double-click on this file, it will be opened in the Eclipse editor. Note that the editor is fully UPC-aware and provides several UPC-specific features, including markup of UPC keywords.